Phishing campaign targets prominent X users, accounts at risk - Related to accounts, a, targets, happened…, campaign
How to clean a Mechanical Keyboard!

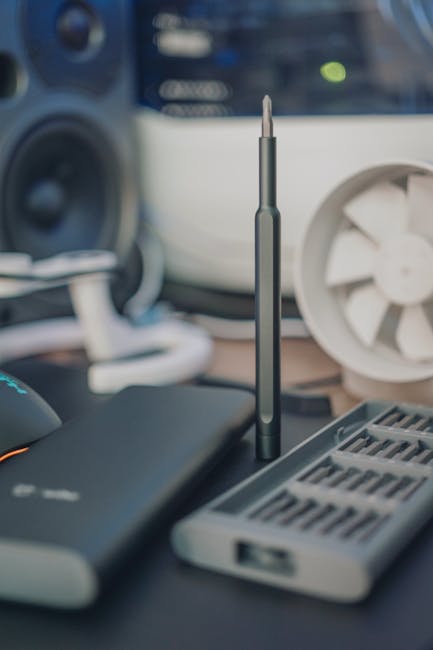
I want to tell you about this keyboard, I’ve been using the XTRFY K40 TKL RGB for 2 years now. It has been my go-to ever since it launched in 2019. Naturally after all that time there is some gunk accumulation. Nothing has been spilled over, it is just particles, but it got gunky on the keycaps and on the actual frame, there is also a bunch of crap underneath the keycaps.
I’m not a keyboard cleaning master, but. We are going to use some common sense and some commonly available tools. You could buy keyboard cleaning kits on Amazon, but there is like a 1000 variations of them and most are not are actually good.
I have done a few deep cleans with other keyboards in the past, but. This one is different because this is the Hardware Canucks Edition XTRFY K40. And also the keycaps are not the floating style, which means that getting access to the area around the switches is a bit more difficult, but. I hope we can remove the top element of the frame to give us access to all the nasty gunk.
When it comes to the tools you don’t need a lot. You can use toothpicks, Q-tips, toothbrushes, or maybe even paint brushes, which is what I will be using to remove the gunk around the switches. A keycap puller is of course appreciated. If you have tweezers it is awesome to get access to those hairs. I have a mix of rubbing alcohol and water, and some soapy water for all my keycaps. The first thing I’m going to do is turn the keyboard around and tap it a little bit so that whatever gunk has accumulated around the switches and around the keycaps can fall out.
The next step is removing my top plate, something that is possible on this particular keyboard. Your keyboard might not have this or might not have the top plate altogether with the floating style keycaps, which would make the next process much easier. With my keywords in particular having no top plate gives me enhanced access to the very edges of the keyboard for enhanced cleaning. This allows me to clean this portion separately and also will make it much, much easier to actually remove the keycaps. Now before removing the keycaps you can take a photo of it so you can reassemble the keycaps back in place easier. You can also find this product online, open it up on your monitor, and have a much larger image of where each keycap goes which is what I’m going to do.
And it’s time to remove all the keycaps. Because I removed the top plate removing the actual keycaps that are on the edges is much easier. We also have a keycap puller so this is going to be just a much faster job. You have got to be careful removing the larger keys because of the stabilizer, I like to kind of pull on one side and. Then pull on the other.
The next thing is for our keycaps to take a nice soapy bath. Not only will this get rid of any gunk that is underneath the keycap near the stem, but. Also help to dissolve any of that grease and gunk that has accumulated over time on the actual surface. Now I did say that I’m pretty impressed with how clean it is, but at closer inspection it is actually quite nasty, not just the large hair particles. But if you go really close with the macro lens you can see just a gunk accumulation.
After removing a few screws the top plate of this keyboard comes off easily. Surprisingly there was even stuff inside the black frame. And now I know why this keyboard sounds so good, because of this dampening foam that fills in the otherwise hollow base. I will remove the cable just so that it’s not in my way.
For this next part I’m using a paint brush, you can use a toothbrush or something with hard bristles to remove any of the large particles like hairs and. Stuff. I’m really surprised at how like dispersion of these large particles is very specific to around the spacebar, around the Enter. And there is so much gunk around from my left Shift. You will want to use something hard that doesn’t absorb liquid because as I go over with the paint brush I can feel that it is very grimy already and. That’s not a good thing.
It’s interesting the stuff that comes out of the stabilizers. Because they are also lubed there is a bunch of hair that’s also lubed now… which is just great. Now that all the large and visible hairs have been removed from the base, it’s time to use a cotton swap to go around the really nasty areas and. Just like try and scrub off the grim. It is really crucial to make some rubbing alcohol in the water, because otherwise if you were just using water this gunk would not come off as easy it would just spread around a bit.
This was a bit more difficult than I expected to be honest. Just because I didn’t expect the grime to be so sticky. It’s not just a matter of coming in with a cotton swab and wiping it off. You really physically have to scrub it off and then come in again with something else with a new cotton swab to remove the gunk that way. The good thing is it was fairly concentrated on the spacebar around the left Shift and around the right Enter as well. Even the WASD area was fairly clean and everything else outside of it is pretty much brand new. Now it’s time to wash the keycaps and reassemble the keyboard. I made the mistake of using the paint brush before removing all the grime with the cotton swab, so the grime got absorbed into the paintbrush and now it’s kind of nasty and very sticky I had to wash it with soap and even after that it’s not back to normal.
Now it’s time to work on our keycaps. They have been soaking in the soapy water for about an hour and what I like to do is take them out one by one and dry them on a kitchen towel. One thing to keep in mind is there is going to be a lot of water inside the keycap itself so you got to tap them to remove some of that water and. Place them face them up so that portion can dry. You should also replace this water a couple of times before actually drying the keycap, just to remove any of the soap and. Any residue that has accumulated in the water itself. I am going one by one, just so I can clean all five sides of the keycap, not just the top surface, but whatever gunk has accumulated on the side of the keycap.
Once they are all dry and. On the keyboard I will give them one last polish, but that’s pretty much it. I’m very happy with the the keyboard base and all the gunk has been removed around the switches around the stabilizers. As mentioned before the stabilizers are lubed so there was a lot of stuff accumulated around the lube. Abd you have to be careful not to take the lube out or not remove too much of it, but if you have your own you can always replenish the lube on the stabilizers yourself.
Now our base is clean, our keycaps are dry. And my gosh the feeling of the base plate around the switches is so different now. It’s no longer sticky and grimy, it’s smooth, and the difference is noticeable because this is a white base plate so all the gunk was very visible. Next I reconnected the cable, and before I put the top light back on, I want to do one last sweep for anything that has accumulated and. That I didn’t fully pick up. Notice that I’m brushing up or down, I’m not trying to brush within the keyboard because that doesn’t get rid of the particles away from the actual board. With this one last sweep, it looks brand new basically and it’s time to do the keycaps.
This is my least favorite part. I do have the image of the keyboard open on my monitor so I can refer to that for layout, but normally what I like to do is start with like the F keys, the larger Control/Enter/Shift keys that I know the location of. And then move on to filling in the rest.
The last thing I’m doing is giving each key a little polish just to remove any residue that I have put on it while handling the keycaps. After that it really does look brand new, well done me. Now this wasn’t too hard on this keyboard because the top plate is removable to give me more effective access to all the gunk and stuff around the switches. But if you have a floating style keyboard it’s even easier. The main thing to keep in mind when you’re cleaning around the switches is to make sure that the tools you’re using don’t leave any residue. The little bristles on my brushes they did fall off a couple of times. That’s why I had to do one last cleaning before I put everything together. Also don’t use too much liquid because that could damage the PCB inside the keyboard. Careful not to use too much alcohol, especially with ABS keycaps, because it will rub off some of that coating.
For keyboards that do disassemble I would recommend it to make your job easier. Of course, keeping in mind how to assemble the keyboard back together. For example, here it’s good that you don’t need to remove any of the rubber feet to access the screws. All four screws are easily accessible, but for some keyboards you would need to remove a rubber foot underneath where you find the screw. This was a very simple procedure, I’m not this assembling any of the switches to remove some gunk there, I’m not removing all the lube from the stabilizers, and. Thankfully there is still plenty of it even after me carving some of that out stuff so that I could remove some of that residue.
Overall, I’m very happy how this turned out. This is basically in a brand new condition just as I got it 2 years ago. If you have any keyboard cleaning experience, let me know in the comments, and. If you have ever had to clean switches how did you do it? Thanks for reading and clean your keyboards responsibly.
A phishing campaign is targeting X customers, experts warn.
Zero-water evaporation system will virtually eliminate water usage across Microsoft-owned data cente...
I am so excited to finally experience a Louqe enclosure. They are the guys responsible for the Ghost...
Razer Blackshark V2 X – After 6 Months, THIS happened…

Something we want to do more of is long-term coverage, not just for smartphones, but for a wider range of products. I see so many comments on our Razer reviews talking about long-term quality concerns, which is totally legitimate. Like we have these parts for 1 to 2 weeks before launch, and. To be honest that is not enough time to see how the product has fared over time. And so that is exactly what we are doing today with the $59 Blackshark V2 X headset. This has been my go-to wired headset for gaming on a daily basis for the past 6 months.
I still feel like my original comment from the review applies here: “I’m actually a lot more excited about the V2 X. Because it’s only $59. I think this is going to be the most popular $59 headset on the market”. But as expected it hasn’t been without issues, right? Many other people have added to the whole feedback loop, and today I want to answer one simple question: Whether or not this headset is still worth it at the $59 price point after 6 months of daily use.
If you haven’t seen the original review, check it out over here. But let’s get into the issues shall we? My main issue with the build quality is the variance in size extension. On my budget V2 X it’s been perfectly fine since Day 1, so nice resistance, it stays in position and it’s not going anywhere, but. On the more expensive V2 and even the V2 Pro Wireless some have arrived really loose where the weight of the ear cup would slide down on the size extensions without me even touching it. This exhibits that there is a significant tolerance difference between each headset and they have gone through 6 pairs. All of which had some variation of nice density versus really loose. Therefore, it is a risk factor for people who are buying the V2 model headset, because I have no idea what type of copy you will get.
The next big issue I have encountered is with the four-pole headset jack that isn’t properly secured into that splitter cable. This means it can easily be disconnected with a slight pull or have unbalanced signal if the plug pulls out slightly. I have read so many reviews, and also experienced these issues myself, where you get unbalanced left and. Right representation if this four-pole jack gets slightly pulled out. The connection is very loose so it’s very easy to dislodge, and you will obviously think that there is something faulty with the headset because the left and. Right are not even. This also extends into the microphone quality where even if the four-pole jack is connected properly into the splitter cable, the rotation of that connection will impact the microphone quality and. The left and right balance too. Basically, this splitter cable is a big mistake from Razer because many will just think that the headset is faulty and it will result in many negative reviews and. RMAs. I totally agree with the individuals here, this splitter extension is terrible.
As for all other cables on the headset. I have had no issues whatsoever. The exposed green cable on the top I thought might give me problems over time, but it always bends in the right way. I’m also happy with how little cable noise you hear when the cable is brushing against shirt or something, it’s quiet and muted.
And it next up is the microphone arm, and. Unfortunately it has lost a lot of its memory, so it no longer stays in the proper position as it used to before. This will continue to get worse over time and might eventually just get too loose to stay in proper position near your mouth. This makes me appreciate removal microphones, since you might replace it later on, but. Also if you remove it you are not using that bendy thing on a daily basis. I also appreciate the solid boom arms from like Sennheiser headsets that are staying strong and will stay there for life.
Next up I either did not notice this at the time of the review or maybe the ear cup fit has gotten slightly loose. Because they rotate way too easily inside the housing. The ear cushions for example can simply change position when you are putting the headset on or off. This might create this non-symmetrical feel between left and right. I noticed it because the seams were not aligned and since the ear cups are oval – not round – this change and rotation will affect how they seal in the sound and. How they feel on your head in terms of comfort. It is an easy solution because you can simply see where the seam is and rotate it accordingly. Just make sure they are both facing down, but it’s still something that I have to keep in mind. I am surprised with how well this fake leather has held up throughout both the ear cups and the headband, knowing that my other headphones have started to flake with this material.
Both the headband and the ear cups are in perfect condition since Day 1, but. I will say that the interior material that makes contact with your skin is a bit harsh, especially if you like to wear your headset one side at a time like me and constantly go from full headset to trying to hear what is happening in your external environment. That motion where the ear cups rubs against your head is very harsh. I don’t appreciate that part of the comfort over time simply because my other headphones that have much enhanced padding are just a lot more comfortable. That is really the only downside with comfort, because everything else about it like the claiming force and. The weight are fantastic.
And the last bit that has changed since the original review is the volume dial. First of all, I never got used to it being on the left side, since that is my keyboard hand and removing that to change the volume leaves me vulnerable in games since I’m not strafing side to side. Like with all other gaming headsets where the volume connection/dial is on the right side. But the main thing here is that the volume wheel for the first 50% has gotten slightly loose, which is weird because I never used that volume range anyway, while the other 50% as smooth and resistant and. Smooth as Day 1.
As for my outlook on audio performance, it’s kind of funny to read some Amazon reviews that express their disappointment in the audio quality. This is a $59 headset, so let’s lower our expectations okay. The bass here is slightly boomy, but I appreciate that there is no harshness on the high-end, especially if you max out the volume. I still stand by what I introduced, it is satisfactory for the $59 price point. It’s not going to compete in terms of detail and resolution to something more premium, like a proper Philips Fidelio X3 headphone for example, but I have been using it for 6 months and in games I can pinpoint where everything is happening and you can drive this easily with both the motherboard and. A headphone amplifier without issues.
Also, a couple of people who have reviewed this headset have mentioned that the volume output on consoles is a bit low to their liking. I don’t own a console, so I can’t really comment on that, but it is something you should take note of if you are planning to use this with a gaming controller or plugging it directly into a console.
The microphone quality on this pair is fantastic for the $59 price point. This is the headset I have been using for all my video calls, because I sound great and I can hear everyone just fine. Two things to keep in mind is that there is no built-in sidetone, unless you enable it through software or through your amplifier. So if you don’t like that muted sound when you speak that is something to keep in mind. Also, as mentioned earlier, the mic boom arm has lost a lot of that stiffness or firmness, so it’s a lot more flexible in a bad good way versus Day 1.
The takeaway from this long-term recap for the V2 X is that it has held up pretty well. Perhaps a 6 months window is too short of a timeframe to see proper degradation when it comes to audio products, but. I have been using this literally on a daily basis for the past 6 months so I thought this would be a good time to give you a recap. The two main disappointments are the splitter cable that will cause confusion, frustration, and definitely RMAs when people are not realizing that maybe the splitter cable is causing the unbalancing and the microphone issues.
Secondly. Those sides extensions really need to be fixed so there is consistency across each V2 pair, because in all six pairs there were all slightly different. I just got lucky with the cheapest pair having the best density to the extensions and staying in place as they should. And so to come back to that original question, whether or not this thing is still worth it for the $59 price point? And I would say yes, even though you might encounter slight variation in the size extensions. That is somewhat okay given that it is a budget entry. Now it is not okay when you are spending double the amount on the V2 Pro Wireless and you are experiencing all the same build quality concerns. But I would say in that $50 budget territory some of the compromises that we see with this pair are okay. Just keep in mind that splitter cable, I hope you get a good one where everything just like snaps into place and it’s not a very loose connection. But otherwise I would say the Blackshark V2 X still gets my recommendation. All right. I hope you enjoyed this a slightly longer recap, share your usage history of Razer or any other gaming products over time and how they have held up in your daily usage.
Apple just dropped an app that’s all about creating event invites.
Moving to another aspect, there is always comments that keep popping up in a lot of our cooler videos asking us to review the ...
Nintendo has confirmed that it's already preparing for Switch 2 scalpers.
Phishing campaign targets prominent X users, accounts at risk
A phishing campaign is targeting X individuals, experts warn.
The aim is to take over accounts and advertise a fraudulent crypto scheme.
High-profile accounts on the social media network X (formerly known as Twitter) are being targeted by a phishing campaign, experts have warned.
A research from SentinelLabs outlined how prominent accounts belonging to US political figures, large tech organizations, leading international journalists, and even an X employee, have been attacked via a phishing campaign.
Although the primary targets are large accounts with a high follower account, everyone should be on the lookout for this attack: here’s what we know so far.
Additionally, in its findings. SentinelLabs notes the aim of the attack is to compromise an account, lock out the legitimate owner, and post fraudulent cryptocurrency opportunities or links to external sites, which are designed to ‘lure additional targets’, most commonly with a crypto-theft related theme.
It seems the attack originates from a range of phishing tactics, one being the notorious login notice. This works by sending the victim an email to notify them their account was accessed from a new device, and that the location of the device was in a foreign city.
From there. A link is provided for customers to ‘secure’ their accounts and provide their username and change the account password. This page is fake, and the victims have then unwittingly provided their credentials to a threat actor.
The campaign uses several phishing domains for this, like x-recoversupport[.]com and securelogins-x[.]com, and in some cases. Researchers observed the campaign abusing Google’s ‘AMP Cache’ domain in order to bypass email detections and reroute the user to a phishing domain.
The criminal then takes over the account and begins using the accounts audience to advertise cryptocurrency scams. The high profile accounts allow criminals to maximise their financial profit by reaching a wider audience and collecting more victims.
Crypto scams are incredibly dangerous, and lucrative. With the FBI in the recent past estimating in 2024 alone, the scams cost victims more money than ransomware.
To avoid such fraudulent schemes, investors should be ultra-careful that their investment is legitimate. The cryptocurrency market is largely unregulated, which makes it the perfect environment for scammers and criminals - so be sure to heavily research any investments before handing over your data or money.
The key part of this attack is the initial phishing email. Social engineering attacks like phishing are dangerous because they catch individuals off guard, naturally staying alert is the best defense.
Phishing attacks will prompt victims to reveal their personal information, like logins, credentials. Financial information, and more. This puts victims at risk of identity theft or fraud.
It is true that some platforms will email you if there’s an unrecognized sign-in to a new device. Which is what makes this campaign so convincing. It’s easy to say that consumers should be extra careful, but sometimes that’s just not enough, so here are some extra tips to stay protected.
First of all, create a strong and secure password, and. Crucially do not reuse passwords from one site to another - this helps by quarantining any account that has been breached.
Next, enable multi-factor authentication or MFA, especially for sites that hold medical or financial information. Although this can be a bit of a faff, it's a great extra layer of security and. Gives you a peace of mind knowing that criminals would struggle that bit more to access your data.
Another thing to look out for is mismatched or suspicious domains. If you receive an email you’re not expecting, especially one prompting action and including a link. Check the spelling of the domain, Faceb00k rather than Facebook. It’s never a bad idea to Google what the legitimate domain would be, either.
The final thing to look for is odd attachments - if the sender is unknown and the email contains links. Images, or documents - this is a red flag. Qr codes are particularly dangerous, so don’t scan anything you’re not certain is safe.
Meta has reportedly ended all software updates to the Oculus Quest.
Standard CPU coolers, while adequate for managing basic thermal loads. Often fall short in terms of ...
Compact computing systems have gained significant market share over the last decade. Improvements in...
Market Impact Analysis
Market Growth Trend
| 2018 | 2019 | 2020 | 2021 | 2022 | 2023 | 2024 |
|---|---|---|---|---|---|---|
| 4.9% | 5.9% | 6.2% | 6.9% | 7.3% | 7.5% | 7.6% |
Quarterly Growth Rate
| Q1 2024 | Q2 2024 | Q3 2024 | Q4 2024 |
|---|---|---|---|
| 6.9% | 7.2% | 7.4% | 7.6% |
Market Segments and Growth Drivers
| Segment | Market Share | Growth Rate |
|---|---|---|
| Semiconductors | 35% | 9.3% |
| Consumer Electronics | 29% | 6.2% |
| Enterprise Hardware | 22% | 5.8% |
| Networking Equipment | 9% | 7.9% |
| Other Hardware | 5% | 5.3% |
Technology Maturity Curve
Different technologies within the ecosystem are at varying stages of maturity:
Competitive Landscape Analysis
| Company | Market Share |
|---|---|
| Apple | 18.7% |
| Samsung | 16.4% |
| Intel | 12.9% |
| NVIDIA | 9.8% |
| AMD | 7.3% |
Future Outlook and Predictions
The Clean Mechanical Keyboard landscape is evolving rapidly, driven by technological advancements, changing threat vectors, and shifting business requirements. Based on current trends and expert analyses, we can anticipate several significant developments across different time horizons:
Year-by-Year Technology Evolution
Based on current trajectory and expert analyses, we can project the following development timeline:
Technology Maturity Curve
Different technologies within the ecosystem are at varying stages of maturity, influencing adoption timelines and investment priorities:
Innovation Trigger
- Generative AI for specialized domains
- Blockchain for supply chain verification
Peak of Inflated Expectations
- Digital twins for business processes
- Quantum-resistant cryptography
Trough of Disillusionment
- Consumer AR/VR applications
- General-purpose blockchain
Slope of Enlightenment
- AI-driven analytics
- Edge computing
Plateau of Productivity
- Cloud infrastructure
- Mobile applications
Technology Evolution Timeline
- Technology adoption accelerating across industries
- digital transformation initiatives becoming mainstream
- Significant transformation of business processes through advanced technologies
- new digital business models emerging
- Fundamental shifts in how technology integrates with business and society
- emergence of new technology paradigms
Expert Perspectives
Leading experts in the hardware tech sector provide diverse perspectives on how the landscape will evolve over the coming years:
"Technology transformation will continue to accelerate, creating both challenges and opportunities."
— Industry Expert
"Organizations must balance innovation with practical implementation to achieve meaningful results."
— Technology Analyst
"The most successful adopters will focus on business outcomes rather than technology for its own sake."
— Research Director
Areas of Expert Consensus
- Acceleration of Innovation: The pace of technological evolution will continue to increase
- Practical Integration: Focus will shift from proof-of-concept to operational deployment
- Human-Technology Partnership: Most effective implementations will optimize human-machine collaboration
- Regulatory Influence: Regulatory frameworks will increasingly shape technology development
Short-Term Outlook (1-2 Years)
In the immediate future, organizations will focus on implementing and optimizing currently available technologies to address pressing hardware tech challenges:
- Technology adoption accelerating across industries
- digital transformation initiatives becoming mainstream
These developments will be characterized by incremental improvements to existing frameworks rather than revolutionary changes, with emphasis on practical deployment and measurable outcomes.
Mid-Term Outlook (3-5 Years)
As technologies mature and organizations adapt, more substantial transformations will emerge in how security is approached and implemented:
- Significant transformation of business processes through advanced technologies
- new digital business models emerging
This period will see significant changes in security architecture and operational models, with increasing automation and integration between previously siloed security functions. Organizations will shift from reactive to proactive security postures.
Long-Term Outlook (5+ Years)
Looking further ahead, more fundamental shifts will reshape how cybersecurity is conceptualized and implemented across digital ecosystems:
- Fundamental shifts in how technology integrates with business and society
- emergence of new technology paradigms
These long-term developments will likely require significant technical breakthroughs, new regulatory frameworks, and evolution in how organizations approach security as a fundamental business function rather than a technical discipline.
Key Risk Factors and Uncertainties
Several critical factors could significantly impact the trajectory of hardware tech evolution:
Organizations should monitor these factors closely and develop contingency strategies to mitigate potential negative impacts on technology implementation timelines.
Alternative Future Scenarios
The evolution of technology can follow different paths depending on various factors including regulatory developments, investment trends, technological breakthroughs, and market adoption. We analyze three potential scenarios:
Optimistic Scenario
Rapid adoption of advanced technologies with significant business impact
Key Drivers: Supportive regulatory environment, significant research breakthroughs, strong market incentives, and rapid user adoption.
Probability: 25-30%
Base Case Scenario
Measured implementation with incremental improvements
Key Drivers: Balanced regulatory approach, steady technological progress, and selective implementation based on clear ROI.
Probability: 50-60%
Conservative Scenario
Technical and organizational barriers limiting effective adoption
Key Drivers: Restrictive regulations, technical limitations, implementation challenges, and risk-averse organizational cultures.
Probability: 15-20%
Scenario Comparison Matrix
| Factor | Optimistic | Base Case | Conservative |
|---|---|---|---|
| Implementation Timeline | Accelerated | Steady | Delayed |
| Market Adoption | Widespread | Selective | Limited |
| Technology Evolution | Rapid | Progressive | Incremental |
| Regulatory Environment | Supportive | Balanced | Restrictive |
| Business Impact | Transformative | Significant | Modest |
Transformational Impact
Technology becoming increasingly embedded in all aspects of business operations. This evolution will necessitate significant changes in organizational structures, talent development, and strategic planning processes.
The convergence of multiple technological trends—including artificial intelligence, quantum computing, and ubiquitous connectivity—will create both unprecedented security challenges and innovative defensive capabilities.
Implementation Challenges
Technical complexity and organizational readiness remain key challenges. Organizations will need to develop comprehensive change management strategies to successfully navigate these transitions.
Regulatory uncertainty, particularly around emerging technologies like AI in security applications, will require flexible security architectures that can adapt to evolving compliance requirements.
Key Innovations to Watch
Artificial intelligence, distributed systems, and automation technologies leading innovation. Organizations should monitor these developments closely to maintain competitive advantages and effective security postures.
Strategic investments in research partnerships, technology pilots, and talent development will position forward-thinking organizations to leverage these innovations early in their development cycle.
Technical Glossary
Key technical terms and definitions to help understand the technologies discussed in this article.
Understanding the following technical concepts is essential for grasping the full implications of the security threats and defensive measures discussed in this article. These definitions provide context for both technical and non-technical readers.
ASIC intermediate
CPU intermediate
RAM intermediate
TPU intermediate
platform intermediate
liquid cooling intermediate
Related Articles